

In this article, we will create a panel where we can manage the feedback we receive from our web application.
We will quickly create an api with Strapi.io and then develop its frontend with refine. Thus, let's see how an admin panel can be created in a very short time with the perfect harmony of Strapi and refine.
Features that our panel will have:
- Authentication with strapi.io
- A page to list feedbacks
- Mutation on Feedbacks
Creating api with Strapi
Let's create our backend project with Strapi's quick start guide.
npx create-strapi-app strapi-feedback-api --quickstart
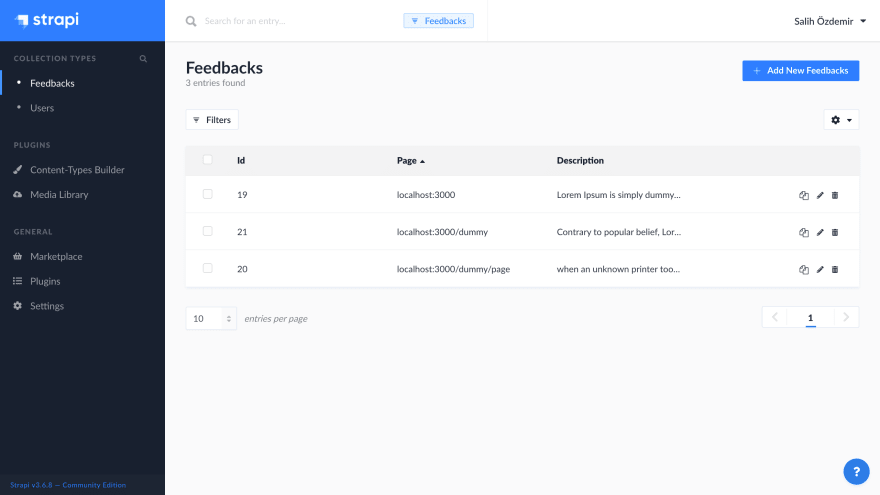
After the installation is complete, the tab will automatically open in the browser. Here, let's create a feedback collection with Content-Types Builder.
Quite simply, a feedback should have a description text field, A page text field that shows the page the feedback was sent from, and a type enumeration field indicating the type of feedback (issue, idea, other, archive).

Creating panel with refine
Let's create our frontend project with refine's setting up guide.
There are two alternative methods to set up a refine application. We will quickly create our application with superplate.
npx superplate-cli refine-feedback-client
Select the following options to complete the CLI wizard:
? Select your project type:
❯ refine-react

? What will be the name of your app:
> refine-strapi-web

? Package manager:
❯ Npm

? Do you want to use a UI Framework?:
❯ Ant Design

? Do you want a customized theme?:
❯ Default theme

? Router Provider:
❯ React Router v6

? Data Provider:
❯ Strapi v3

? Do you want a customized layout?
❯ Yes

? i18n - Internationalization:
❯ No
After the installation is completed, Strapi-specific data provider, auth provider, and also layout components that we can change the default view of Refine with the custom layout option will be included in our project.
Now, bootstrap the app with the following command:
npm run dev
Now let's list the changes we will make:
- Change our Strapi API URL
- Remove components that we will not use when changing the refinement look
- Adding resources according to the collection name we created in Strapi
+ import { Refine } from "@pankod/refine";
import "@pankod/refine/dist/styles.min.css";
import { DataProvider } from "@pankod/refine-strapi";
import strapiAuthProvider from "authProvider";
import {
- Title,
  Header,
- Sider,
- Footer,
  Layout,
  OffLayoutArea,
} from "components";

function App() {
-  const API_URL = "your-strapi-api-url";
+  const API_URL = "http://localhost:1337";

  const { authProvider, axiosInstance } = strapiAuthProvider(API_URL);
  const dataProvider = DataProvider(API_URL, axiosInstance);
  return (
    <Refine
      dataProvider={dataProvider}
      authProvider={authProvider}
-     Title={Title}
      Header={Header}
-     Sider={Sider}
-     Footer={Footer}
      Layout={Layout}
      OffLayoutArea={OffLayoutArea}
      routerProvider={routerProvider}
      resources={[
        {
          name: "feedbacks",
        },
      ]}
    />
  );
}


export default App;
After adding the resource, our auth provider was activated.
Now let's create a user on the Strapi to be able to login to the application.

We created a user and login to the application with this user.

Let's customize the layout component, remove the sider and add a header.
Custom Layout
import React from "react";
import { Layout as AntLayout } from "antd";

import { LayoutProps } from "@pankod/refine";

export const Layout: React.FC<LayoutProps> = ({
  children,
  Header,
  OffLayoutArea,
}) => {
  return (
    <AntLayout style={{ minHeight: "100vh", flexDirection: "row" }}>
      <AntLayout>
        <Header />
        <AntLayout.Content>
          {children}
          <OffLayoutArea />
        </AntLayout.Content>
      </AntLayout>
    </AntLayout>
  );
};
Let's customize the header component too
Custom Header
import React from "react";
import { Layout } from "antd";

export const Header: React.FC = () => {
  return (
    <Layout.Header
      style={{
        display: "flex",
        justifyContent: "center",
        alignItems: "center",
        height: "64px",
        backgroundColor: "#FFF",
        borderBottom: "1px solid #f0f0f0",
      }}
    >
      <img src="./refeedback.png" alt="refeedback" style={{ width: "250px" }} />
    </Layout.Header>
  );
};
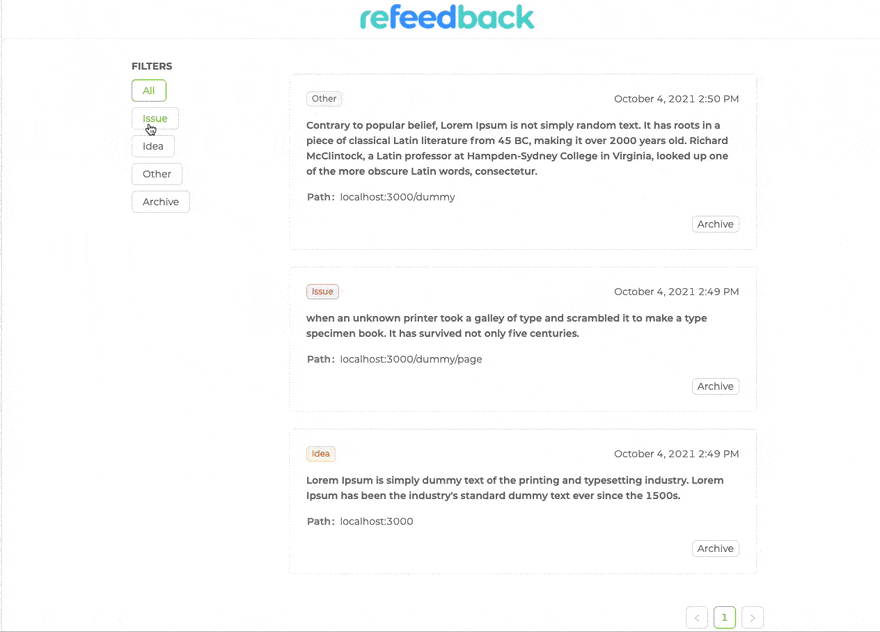
In the new view, there are no siders anymore and the header we have customized is here.

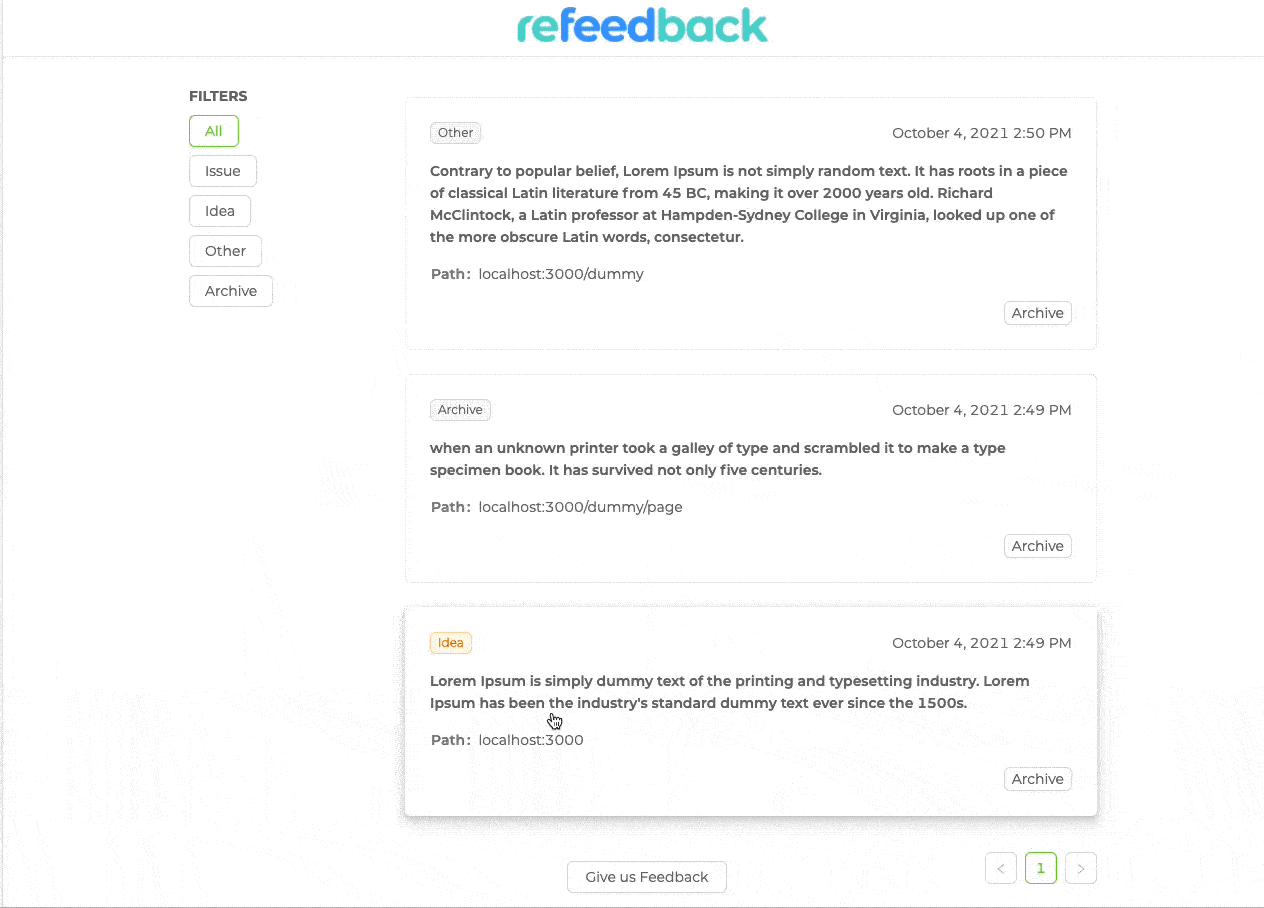
Now we come to the part where we can list our feedback and make changes to it. Before that, let's create dummy feedback records on Strapi.
Create a FeedbackList.tsx file under the pages folder. Then, let's create our component as follows with the components and hooks that come with refine.
Create FeedbackList
import {
  List,
  Typography,
  AntdList,
  useSimpleList,
  CrudFilters,
  Form,
  HttpError,
  Row,
  Col,
  Tag,
  Radio,
  Space,
  Descriptions,
  Button,
  DateField,
  Card,
  useUpdate,
} from "@pankod/refine";

import { IFeedback, IFeedbackFilterVariables, FeedBackType } from "interfaces";

const { Paragraph } = Typography;

const addTagColor = (type: FeedBackType) => {
  switch (type) {
    case "issue":
      return "error";
    case "idea":
      return "orange";
    default:
      return "default";
  }
};

export const FeedbackList: React.FC = () => {
  const { listProps, searchFormProps } = useSimpleList<
    IFeedback,
    HttpError,
    IFeedbackFilterVariables
  >({
    initialSorter: [{ field: "created_at", order: "desc" }],
    onSearch: (params) => {
      const filters: CrudFilters = [];
      const { type } = params;

      filters.push({
        field: "type",
        operator: "eq",
        value: type || undefined,
      });

      return filters;
    },
  });

  const { mutate, isLoading } = useUpdate();

  const renderItem = (item: IFeedback) => {
    const { id, description, type, page, created_at } = item;
    return (
      <AntdList.Item>
        <Card hoverable>
          <AntdList.Item.Meta
            description={
              <div style={{ display: "flex", justifyContent: "space-between" }}>
                <Tag
                  color={addTagColor(type)}
                  style={{ textTransform: "capitalize" }}
                >
                  {type}
                </Tag>
                <DateField format="LLL" value={created_at} />
              </div>
            }
          />
          <Paragraph strong>{description}</Paragraph>
          <Descriptions labelStyle={{ color: "grey", fontWeight: 600 }}>
            <Descriptions.Item label="Path">{page}</Descriptions.Item>
          </Descriptions>
          <div style={{ display: "flex", justifyContent: "end", gap: "4px" }}>
            <Button
              size="small"
              loading={isLoading}
              onClick={() =>
                mutate({
                  id,
                  resource: "feedbacks",
                  values: {
                    type: "archive",
                  },
                })
              }
            >
              Archive
            </Button>
          </div>
        </Card>
      </AntdList.Item>
    );
  };

  return (
    <List title="" pageHeaderProps={{ style: { height: "100%" } }}>
      <Row gutter={[64, 0]} justify="center">
        <Col xs={24} sm={24} md={4} lg={4} xl={4}>
          <Form
            {...searchFormProps}
            layout="vertical"
            onValuesChange={() => searchFormProps.form?.submit()}
            initialValues={{
              type: "",
            }}
          >
            <Form.Item label="FILTERS" name="type">
              <Radio.Group>
                <Space direction="vertical">
                  <Radio.Button value="">All</Radio.Button>
                  <Radio.Button value="issue">Issue</Radio.Button>
                  <Radio.Button value="idea">Idea</Radio.Button>
                  <Radio.Button value="other">Other</Radio.Button>
                  <Radio.Button value="archive">Archive</Radio.Button>
                </Space>
              </Radio.Group>
            </Form.Item>
          </Form>
        </Col>
        <Col xs={24} sm={24} md={14} lg={14} xl={14}>
          <AntdList
            {...listProps}
            split={false}
            renderItem={renderItem}
            itemLayout="vertical"
          />
        </Col>
      </Row>
    </List>
  );
};
export type FeedBackType = "idea" | "issue" | "other" | "archive";

export interface IFeedback {
  id: string;
  description: string;
  page: string;
  user: string;
  type: FeedBackType;
  created_at: Date;
}

export interface IFeedbackFilterVariables {
  type: FeedBackType;
}
In this component
- We listed our records using the
useSimpleListand Ant Design<List>component. - We used Antd
<Form>component to filter our records. - We made it possible to change the
typeof our record withuseUpdate
See detailed usage of useSimpleList for adding new filters, adding search entries, dynamic sorting operations and more here.
Overview
Let's develop feedback widget where we can get feedback to expand the application a little more. For this application, I will develop this component with refine, but you can create this component with Strapi APIs in any way you want.
You can look at the code of the component I developed here.
Now let's add this component to the OfflayouArea component and create feedback on the page and see how it comes to our feedback list.
You can find the source code of the project here: https://github.com/refinedev/refine/tree/master/examples/blog/refeedback