Appwrite
What is Multitenancy?
Multitenancy refers to a kind of architecture where a single instance of software runs on a server and serves multiple customers. In a multi-tenant environment, separate customers tap into the same hardware and data storage, creating a dedicated instance for each customer. Each tenant’s data is isolated and remains invisible to others, but is running on the same server.
Introduction
In this guide, we will create an application with you in the logic of Multi Tenant(Multitenancy). We can say multi tenant application is to separate and manage multiple contents independently from each other in a single application.
We will make a Cake House application using refine and Appwrite. Our Cake House will consist of two separate stores and there will be special products for these stores. We will explain step by step how to manage these stores, products and orders separately.
This guide has been prepared assuming you know the basics of refine. If you haven't learned these basics yet, we recommend reading the Tutorial.
Setup
npm install @pankod/refine-appwrite
Usage
import { Refine } from "@pankod/refine";
import { dataProvider } from "@pankod/refine-appwrite";
import routerProvider from "@pankod/refine-react-router";

import { appwriteClient } from "utility";
import { authProvider } from "./authProvider";

const App: React.FC = () => {
    return (
        <Refine
            dataProvider={dataProvider(appwriteClient)}
            authProvider={authProvider}
            routerProvider={routerProvider}
        />
    );
};
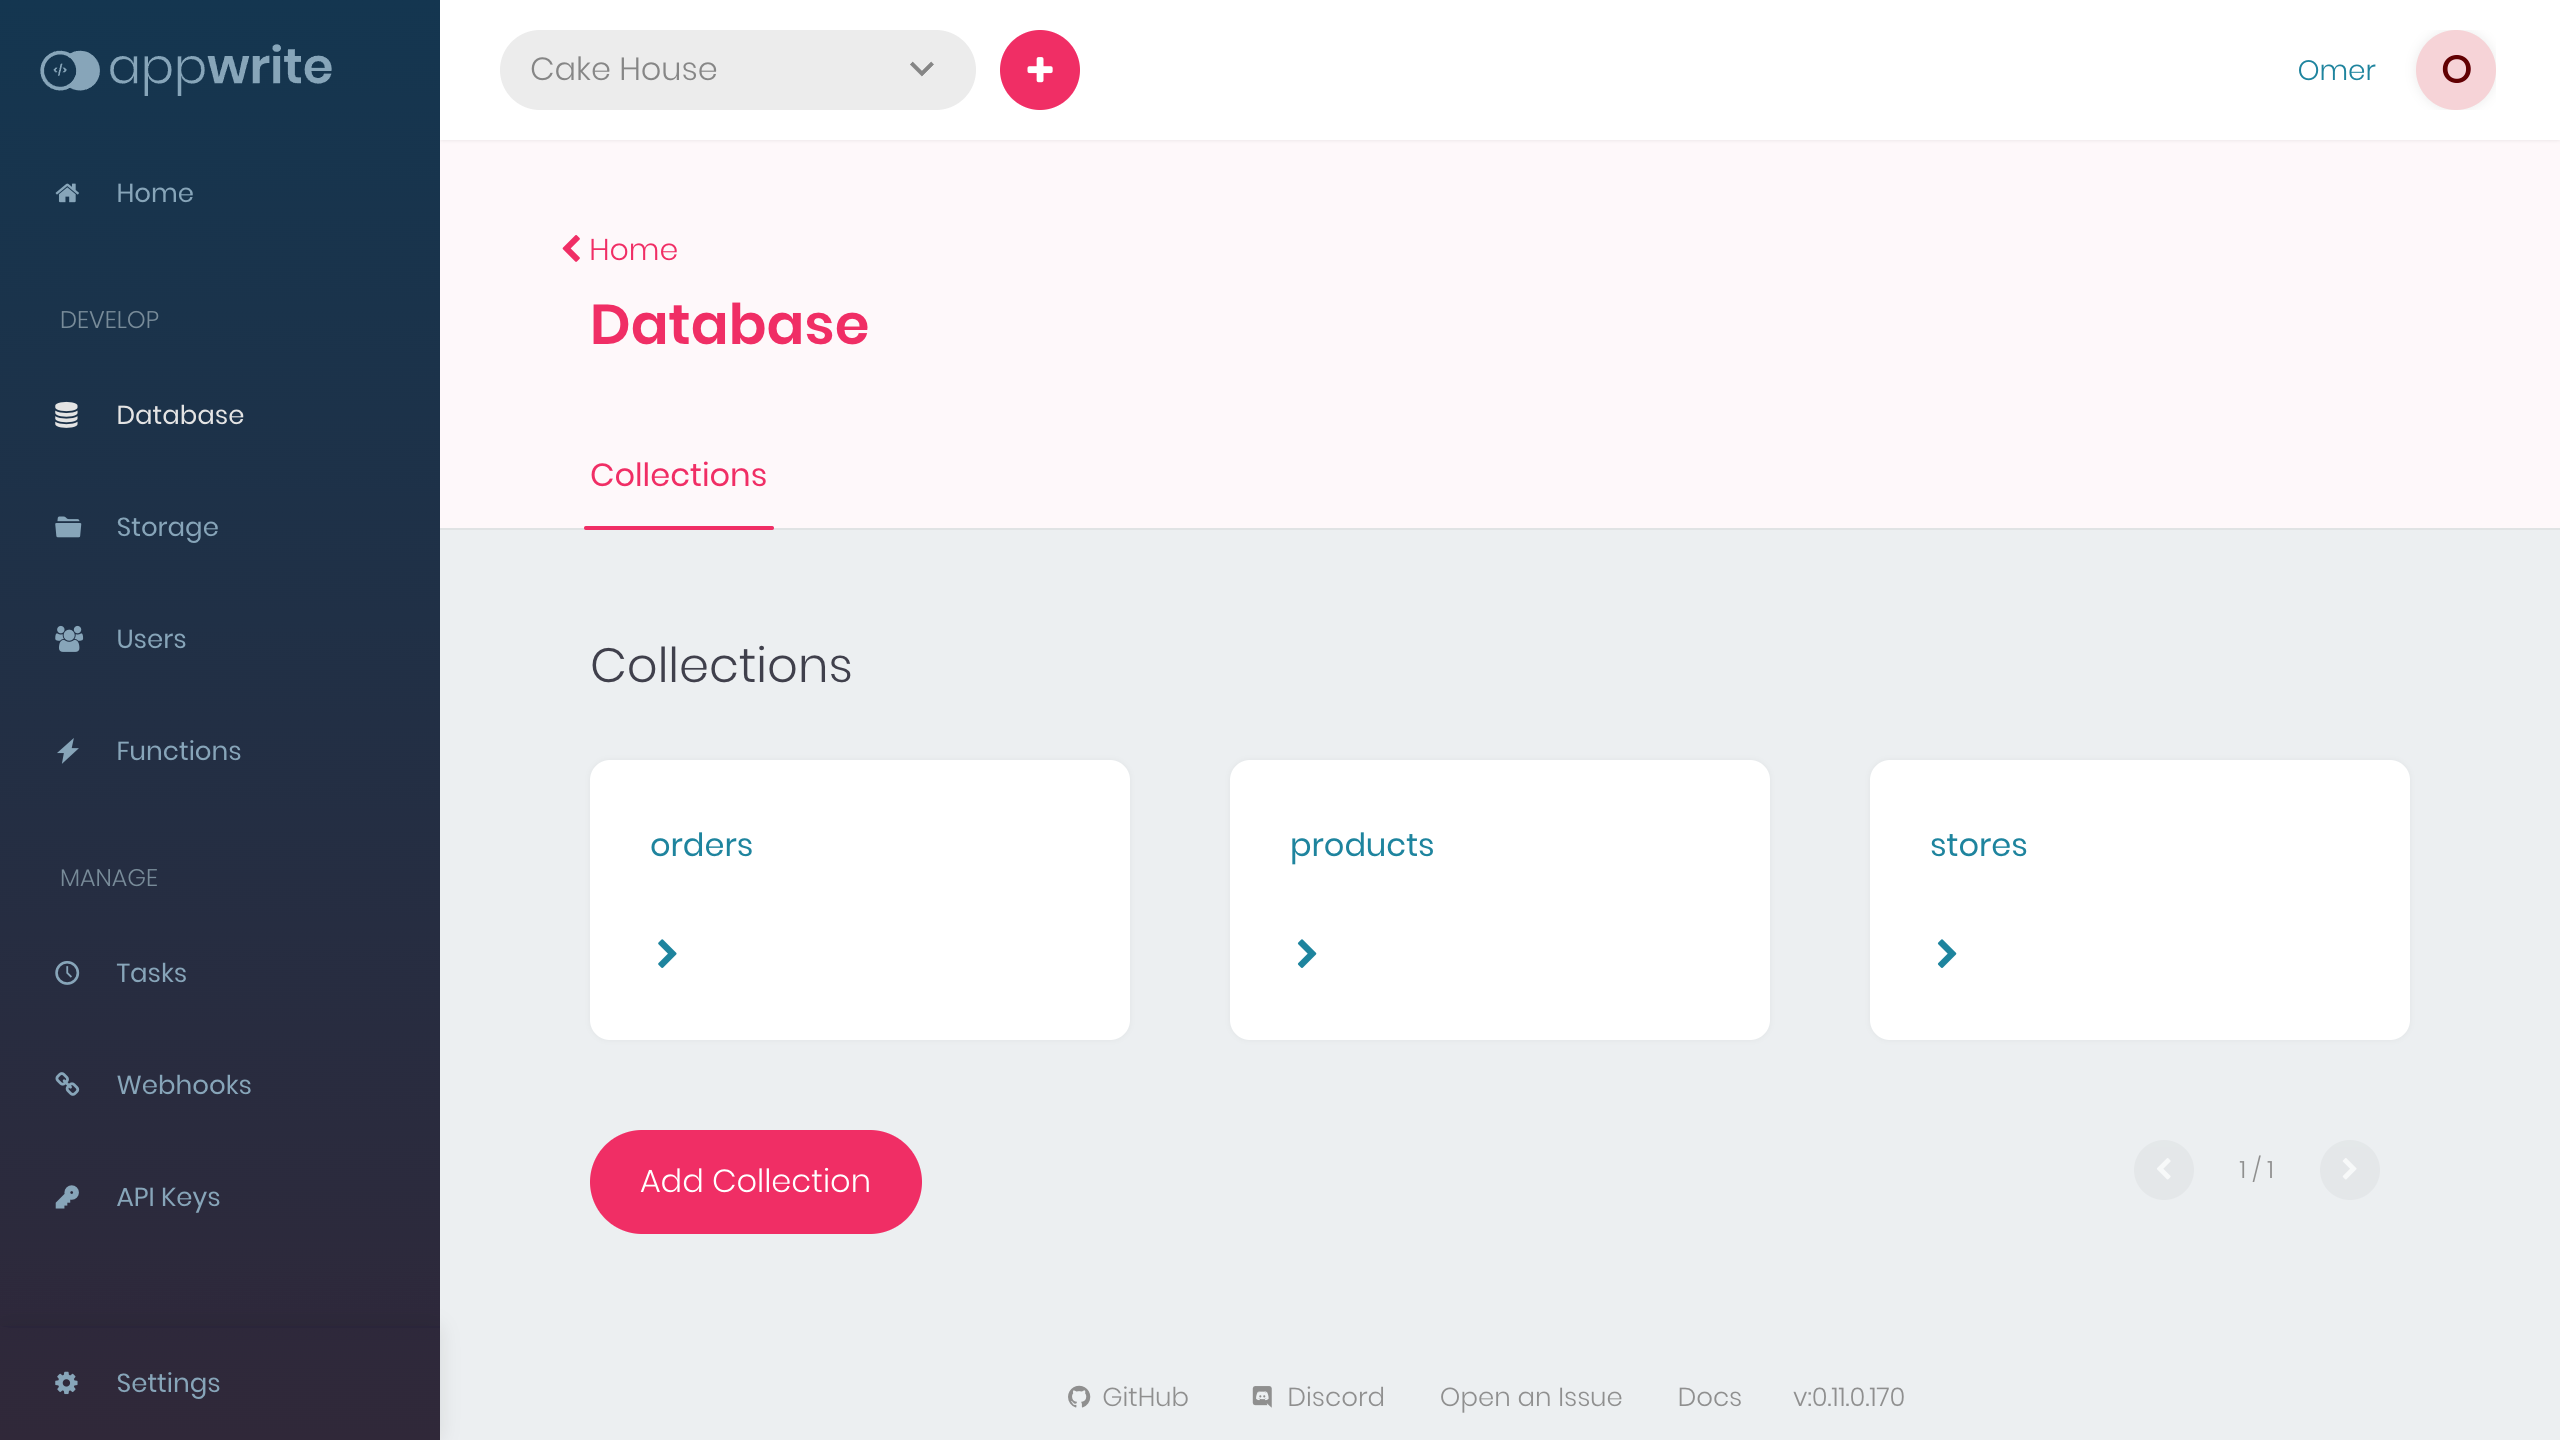
Create Collections
We need three collections for our Cake House application. Let's create these collections in the appwrite database.
stores
- Title: text
products
- Title: text
- Description: text
- Image: wilcard
- StoreId: text
orders
- ProductId: text
- Customer Name: text
- Customer Address: text
- Status: text
- Quantitiy: numeric
- StoreId: text
Now that we have completed the setup and our collections, we can now log in with the refine and start the listing processes.
Store Context
In order to view the products and orders of two different stores separately, we need to filter by storeId. We will use the storeId information in more than one place. For example, when creating a store-specific order.
For this reason, we will create a React Context and keep the storeId state information in it and send it to the relevant refine components.
import { createContext, useState } from "react";

export const StoreContext = createContext<any[]>([]);

export const StoreProvider = (props: any) => {
    const [store, setStore] = useState("61cdb05132609");

    return <StoreContext.Provider value={[store, setStore]} {...props} />;
};
import { Refine } from "@pankod/refine";
import { dataProvider } from "@pankod/refine-appwrite";
import routerProvider from "@pankod/refine-react-router";

import { appwriteClient } from "utility";
import { authProvider } from "./authProvider";

import { StoreProvider } from "context/store";

const App: React.FC = () => {
    return (
        <StoreProvider>
            <Refine
                dataProvider={dataProvider(appwriteClient)}
                authProvider={authProvider}
                routerProvider={routerProvider}
            />
        <StoreProvider>
    );
};
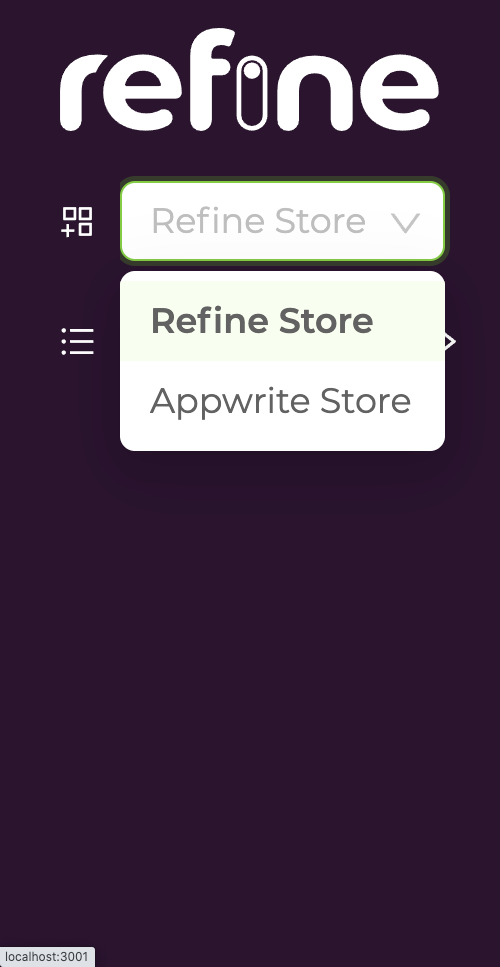
Shop Select to Sider Component
We will create a select component in the Sider Menu where the user will select the stores. Let's create our select component first, then let's see how we can define it in the refine Sider.
import { useContext } from "react";
import { Select, useSelect } from "@pankod/refine";

import { StoreContext } from "context/store";
import { IStore } from "interfaces";

type SelectProps = {
    onSelect: () => void;
};

export const StoreSelect: React.FC<SelectProps> = ({ onSelect }) => {
    const [store, setStore] = useContext(StoreContext);

    const { selectProps: storeSelectProps } = useSelect<IStore>({
        resource: "61cd62db95f92",
        optionLabel: "title",
        optionValue: "id",
    });

    const handleChange = (selectedValue: string) => {
        setStore(selectedValue);
    };

    return (
        <Select
            defaultValue={store}
            style={{ width: 130 }}
            onChange={handleChange}
            onSelect={onSelect}
        >
            {storeSelectProps.options?.map(({ value, label }) => (
                <Select.Option key={value} value={value}>
                    {label}
                </Select.Option>
            ))}
        </Select>
    );
};
Here we have created a select component. Then we fetch the store id and title we created in the Appwrite database with useSelect. Now we can place the store information we have in the state we created in the Store Context.
Let's define the select component in the refine Sider Menu. First, we need to customize the default Sider.
Check out how you can customize Sider Menu →
Show Code
import React, { useState } from "react";
import {
    AntdLayout,
    Menu,
    useMenu,
    useTitle,
    useNavigation,
    Grid,
    Icons,
} from "@pankod/refine";
import { antLayoutSider, antLayoutSiderMobile } from "./styles";

import { StoreSelect } from "components/select";

export const CustomSider: React.FC = () => {
    const [collapsed, setCollapsed] = useState<boolean>(false);
    const Title = useTitle();
    const { menuItems, selectedKey } = useMenu();
    const breakpoint = Grid.useBreakpoint();
    const { push } = useNavigation();

    const isMobile = !breakpoint.lg;

    return (
        <AntdLayout.Sider
            collapsible
            collapsedWidth={isMobile ? 0 : 80}
            collapsed={collapsed}
            breakpoint="lg"
            onCollapse={(collapsed: boolean): void => setCollapsed(collapsed)}
            style={isMobile ? antLayoutSiderMobile : antLayoutSider}
        >
            <Title collapsed={collapsed} />
            <Menu
                selectedKeys={[selectedKey]}
                mode="inline"
                onClick={({ key }) => {
                    push(key as string);
                }}
            >
                <Menu.Item
                    key={selectedKey}
                    icon={<Icons.AppstoreAddOutlined />}
                >
                    <StoreSelect
                        onSelect={() => {
                            setCollapsed(true);
                        }}
                    />
                </Menu.Item>
                {menuItems.map(({ icon, label, route }) => {
                    const isSelected = route === selectedKey;
                    return (
                        <Menu.Item
                            style={{
                                fontWeight: isSelected ? "bold" : "normal",
                            }}
                            key={route}
                            icon={icon}
                        >
                            <div
                                style={{
                                    display: "flex",
                                    justifyContent: "space-between",
                                    alignItems: "center",
                                }}
                            >
                                {label}
                                {!collapsed && isSelected && (
                                    <Icons.RightOutlined />
                                )}
                            </div>
                        </Menu.Item>
                    );
                })}
            </Menu>
        </AntdLayout.Sider>
    );
};
 |
|---|
| As you can see, you can now choose the store you want and create products and orders specifically for the store we have chosen according to the storeId information. |
Product List Page
Now we can list the products of the selected store according to the storeId information by filtering it. We can do this filtering by using the permanetFilter property within the refine's useSimpleList hook.
We separate the products of different stores by using the permanentFilter with the storeId we get from the Store Context. So we can control more than single content in one application.
const [store] = useContext(StoreContext);
const { listProps } = useSimpleList<IProduct>({
    permanentFilter: [{ field: "storeId", operator: "eq", value: store }],
});
Show Code
import { useContext } from "react";
import {
    IResourceComponentsProps,
    useSimpleList,
    AntdList,
    useModalForm,
    useDrawerForm,
    CreateButton,
    List,
} from "@pankod/refine";

import { IProduct } from "interfaces";
import { ProductItem } from "components/product";
import { StoreContext } from "context/store";

export const ProductList: React.FC<IResourceComponentsProps> = () => {
    const [store] = useContext(StoreContext);
    const { listProps } = useSimpleList<IProduct>({
        permanentFilter: [{ field: "storeId", operator: "eq", value: store }],
    });

    return (
        <>
            <List
                pageHeaderProps={{
                    extra: <CreateButton onClick={() => createShow()} />,
                }}
            >
                <AntdList
                    grid={{ gutter: 16, xs: 1 }}
                    style={{
                        justifyContent: "center",
                    }}
                    {...listProps}
                    renderItem={(item) => (
                        <AntdList.Item>
                            <ProductItem item={item} editShow={editShow} />
                        </AntdList.Item>
                    )}
                />
            </List>
        </>
    );
};
Product Create Page
Now let's see how we can create store-specific products. Which store we choose in Sider, the product we will create will automatically be the product of the selected store.
By overriding the onFinish method of the form and sending the selected storeId, we specify which store it will be the product of.
const [store] = useContext(StoreContext);

<Form
    {...formProps}
    ...
    onFinish={(values) => {
        return (
            formProps.onFinish?.({
                ...values,
                storeId: store,
            })
        );
    }}
>
...
Show Code
import {
Create,
Drawer,
DrawerProps,
Form,
FormProps,
Input,
ButtonProps,
Upload,
Grid,
RcFile,
} from "@pankod/refine";
import { appwriteClient, normalizeFile } from "utility";
import { StoreContext } from "context/store";
import { useContext } from "react";
type CreateProductProps = {
drawerProps: DrawerProps;
formProps: FormProps;
saveButtonProps: ButtonProps;
};
export const CreateProduct: React.FC<CreateProductProps> = ({
drawerProps,
formProps,
saveButtonProps,
}) => {
const breakpoint = Grid.useBreakpoint();
const [store, setStore] = useContext(StoreContext);
return (
<Drawer
{...drawerProps}
width={breakpoint.sm ? "500px" : "100%"}
bodyStyle={{ padding: 0 }}
>
<Create saveButtonProps={saveButtonProps}>
<Form
{...formProps}
layout="vertical"
initialValues={{
isActive: true,
}}
onFinish={(values) => {
return (
formProps.onFinish?.({
...values,
storeId: store,
})
);
}}
>
<Form.Item
label="Title"
name="title"
rules={[
{
required: true,
},
]}
>
<Input />
</Form.Item>
<Form.Item label="Description" name="description">
<Input />
</Form.Item>
<Form.Item label="Images">
<Form.Item
name="image"
valuePropName="fileList"
normalize={normalizeFile}
noStyle
rules={[
{
required: true,
},
]}
>
<Upload.Dragger
name="file"
listType="picture"
multiple
customRequest={async ({
file,
onError,
onSuccess,
}) => {
try {
const rcFile = file as RcFile;
const { $id } =
await appwriteClient.storage.createFile(
rcFile,
["*"],
["*"],
);
const url =
appwriteClient.storage.getFileView(
$id,
);
onSuccess?.(
{ url },
new XMLHttpRequest(),
);
} catch (error) {
onError?.(new Error("Upload Error"));
}
}}
>
<p className="ant-upload-text">
Drag & drop a file in this area
</p>
</Upload.Dragger>
</Form.Item>
</Form.Item>
</Form>
</Create>
</Drawer>
);
};
Bonus - Realtime Feature
refine lets you add Realtime support to your app via liveProvider prop for <Refine>. It can be used to update and show data in Realtime throughout your app. refine remains agnostic in its API to allow different solutions(Ably, Socket.IO, Mercure, supabase, etc.) to be integrated.
Refer to the Live Provider documentation for detailed information. →
Appwrite Realtime API support is out-of-the-box supported by refine, just add two lines to make your App Realtime.
import { Refine } from "@pankod/refine";
import { dataProvider, liveProvider } from "@pankod/refine-appwrite";
import routerProvider from "@pankod/refine-react-router";

import "@pankod/refine/dist/styles.min.css";

import { appwriteClient } from "utility";
import { authProvider } from "./authProvider";

import { CustomSider } from "components/sider";
import { Login } from "pages/login";
import { ProductList } from "pages/products";
import { ProductShow } from "components/product";
import { StoreProvider } from "context/store";

function App() {
    return (
        <StoreProvider>
            <Refine
                routerProvider={routerProvider}
                liveProvider={liveProvider(appwriteClient)}
                liveMode="auto"
                dataProvider={dataProvider(appwriteClient)}
                authProvider={authProvider}
                LoginPage={Login}
                Sider={CustomSider}
                resources={[
                    {
                        name: "61cb01b17ef57",
                        list: ProductList,
                        show: ProductShow,
                        options: {
                            label: "Products",
                            route: "products",
                        },
                    },
                ]}
            />
        </StoreProvider>
    );
}

export default App;
Conclusion
In this guide and in our example app, we talked about how we can build Multitenancy apps with refine. Developing a Multitenancy application with refine is quite simple. By creating a context and with the hooks that refine provides, you can quickly and easily produce similar applications in this logic.